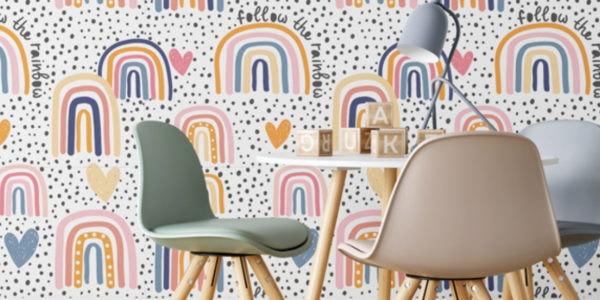
DESIGN HACK: UPCYCLING IDEAS WITH WALLPAPER
Have extra pieces of the Peel & Stick wallpaper left over after installing it on your wall? Don’t throw it away! We have some great upcycling ideas that will allow you to bring new life to old items in your home!
Wait, what’s upcycling, you ask? Simply put, it’s the repurposing of old items into higher quality items. So, in this case, you could use excess pieces of Peel & Stick wallpaper (or why not order a little extra?) to breathe new life and add some personality into existing items in your home.
Here are just a few of our favourite upcycling ideas using Peel & Stick wallpaper:
1. Dress Up Your Furniture:
From your wrapping your dresser drawers, bar carts trays, ugly filing cabinets, toy boxes, side tables and more, why not add a bit of personality to an old, tired piece of furniture in your home? Enter our first upcycling idea! Simply follow these instructions:
-
-
- Remove any hardware that may exist on the surface of your furniture where you are hoping to add wallpaper
- Give the furniture a quick clean/wipe down with soap and water. Let it dry.
- Measure the surface of your furniture that you would like to cover as accurately as possible. Cut your wallpaper to the dimensions needed, leaving yourself extra space to cover the edges, as needed. Remember! Our patterns are all repeating so if your piece of furniture is too large for a single piece of wallpaper, that is okay! You can simply line up another piece and the pattern will continue.
- Peel back a few inches of the back lining of the wallpaper. Crease the back lining so that you have a few inches of your sticky wallpaper available to begin your application. Do NOT fully peel your wallpaper yet — you’ll want to unpeel it slowly as you go.
- Align the top of the wallpaper with the edge of the piece of furniture you are applying it to. Press the exposed sticky area against your wall.
- Did you mess up? Breathe. Smile. Hello Sticky’s Peel & Stick wallpaper is repositionable, so you can adjust its placement – phewph! Slowly peel the wallpaper off and reapply, as necessary.
- Once the top is in position, continue downwards by peeling the back lining down another 5-8 inches and smooth the sticky surface against your furniture, from the centre, outwards. If necessary, use the felt-edge of the squeegee provided to gently move air bubbles to the edge of your wallpaper.
- Repeat until you have covered your piece of furniture.
- Smile and high-five a friend!
-
2. Stairway to Heaven, Anyone?:
Why not add a high-end finish to your stairway by lining your stair risers with your favourite wallpaper print? Enter #2 of our upcycling ideas! It’s easy to do and makes a huge impact! To do so, simply follow these steps:
-
-
- Give the stair risers a quick clean/wipe down with soap and water. Let it dry.
- Measure the height and width of EACH of your stair risers – yes, they may look like they are the same but often they are different!
- Cut your wallpaper to the dimensions needed. Remember! Our patterns are all repeating so if your riser is too wide for a single piece of wallpaper, that is okay! You can simply line up another piece and the pattern will continue.
- Peel back a few inches of the back lining of the wallpaper. Crease the back lining so that you have a few inches of your sticky wallpaper available to begin your application. Do NOT fully peel your wallpaper yet — you’ll want to unpeel it slowly as you go.
- Align the top of the wallpaper with the top of your riser. Press the exposed sticky area against the risers.
- Did you mess up? Breathe. Smile. Hello Sticky’s Peel & Stick wallpaper is repositionable, so you can adjust its placement – phewph! Slowly peel the wallpaper off and reapply, as necessary.
- Once the top is in position, continue downwards by peeling the back lining down and smooth the sticky surface against your riser, from the centre, outwards. If necessary, use the felt-edge of the squeegee provided to gently move air bubbles to the edge of your wallpaper.
- Repeat until you have covered all risers.
- Stand back and marvel your beautiful, new stairway!
-
3. Add a Peek-A-Boo Surprise:
Lining the insides of your drawers or backing of cabinets will do exactly that! Enter #3 of our upcycling ideas! It’s a genius way of personalizing your home and making your interiors sing, and it is much easier than it seems! Simply follow these steps:
-
-
- Give the drawer linings/cabinet backings a quick clean/wipe down with soap and water. Let it dry.
- Measure the area(s) you are hoping to cover with wallpaper.
- Cut your wallpaper to the dimensions needed. Remember! Our patterns are all repeating so if your drawer/cabinet are too wide/long for a single piece of wallpaper, that is okay! You can simply line up another piece and the pattern will continue.
- Peel back a few inches of the back lining of the wallpaper. Crease the back lining so that you have a few inches of your sticky wallpaper available to begin your application. Do NOT fully peel your wallpaper yet — you’ll want to unpeel it slowly as you go.
- Align the top of the wallpaper with the top of the drawer/cabinet. Press the exposed sticky area against the risers.
- Did you mess up? Breathe. Smile. Hello Sticky’s Peel & Stick wallpaper is repositionable, so you can adjust its placement – phewph! Slowly peel the wallpaper off and reapply, as necessary.
- Once the top is in position, continue downwards by peeling the back lining down and smooth the sticky surface, from the centre, outwards. If necessary, use the felt-edge of the squeegee provided to gently move air bubbles to the edge of your wallpaper.
- Repeat until you have covered all drawers/cabinet backings.
- Give yourself a high-five for a job well done!
-
4. See the Light:
Have an old lamp gathering dust in the basement? Enter #4 of our upcycling ideas! Grab it and give it new life by wrapping the shade with wallpaper! To do so, simply:
-
-
- Dust off the lamp shade to ensure any and all dust that may be there is gone.
- Make a stencil of the lampshade by rolling it out on a large piece of paper (gift wrap works great for this!). In particular, trace your lampshade shape onto the gift wrap by laying it on it’s side and rolling it while running your pen onto the gift wrap. Cut out the shape but allow for 1/2 an inch extra beyond your line in order to fold the edges over the shade.
- Using the stencil created, trace and cut out the wallpaper piece to match.
- Peel back 1-2 inches of the wallpaper backing and fold it over. Line the wallpaper up on your shade so that the top and bottoms match. Stick the first section onto the lampshade.
- Then, slowly peel back the backing and continue to stick the wallpaper all the way around the shade.
- If you mess up, breathe. Hello Sticky’s Peel & Stick wallpaper is repositionable, so you can adjust its placement – phewph! Slowly peel the wallpaper off and reapply, as necessary.
- Now, fold over the edges and voila! You have a brand new (and beautiful!) lamp shade.
-
5. Coasters, Cans & Containers:
There is really no limit to the things you can use Peel & Stick wallpaper on to give it some personality. From coasters, to garbage cans, to vases, pots and containers, the options are limitless but the result is the same: stunning. And, did we mention, simple? Enter #5 of our upcycling ideas! To take advantage of this, simply follow these steps:
-
-
- Give the drawer linings/cabinet backings a quick clean/wipe down with soap and water. Let it dry.
- Measure the area(s) you are hoping to cover with wallpaper (make sure to leave about 1/2 inch extra around the sides to allow you to fold over.
- Cut your wallpaper to the dimensions needed. Remember! Our patterns are all repeating so if your item is too wide/long for a single piece of wallpaper, that is okay! You can simply line up another piece and the pattern will continue.
- Peel back a few inches of the back lining of the wallpaper. Crease the back lining so that you have a few inches of your sticky wallpaper available to begin your application. Do NOT fully peel your wallpaper yet — you’ll want to unpeel it slowly as you go.
- Press the exposed sticky area against the item.
- Did you mess up? Breathe. Smile. Hello Sticky’s Peel & Stick wallpaper is repositionable, so you can adjust its placement – phewph! Slowly peel the wallpaper off and reapply, as necessary.
- Once the top is in position, continue downwards by peeling the back lining down and smooth the sticky surface, from the centre, outwards. If necessary, use the felt-edge of the squeegee provided to gently move air bubbles to the edge of your wallpaper.
- Give yourself kudos for a job well done! And search around your house to see how else you can use these upcycling ideas to your benefit!
-
The best thing about each of these upcycling ideas? Not only is it a major benefit to the environment (and your wallet!) to upcycle existing items in your home vs. throwing them away and purchasing new ones, by using Hello Sticky Peel & Stick wallpaper, you can easily remove and change up the wallpaper print whenever your heart desires. So, whether you want it for a day or a decade, we have you covered and you can feel good knowing our Canadian-crafted Peel & Stick wallpaper is LEED Certified, VOC-free, non-toxic, phthalates-free and contains no PVC, so your design choices won’t hurt the environment
Feeling inspired by these upcycling ideas? Check out Good Housekeeping’s article, “38 Genius Trash-to-Treasure Crafts” to learn about other upcycling ideas to add to your repertoire.